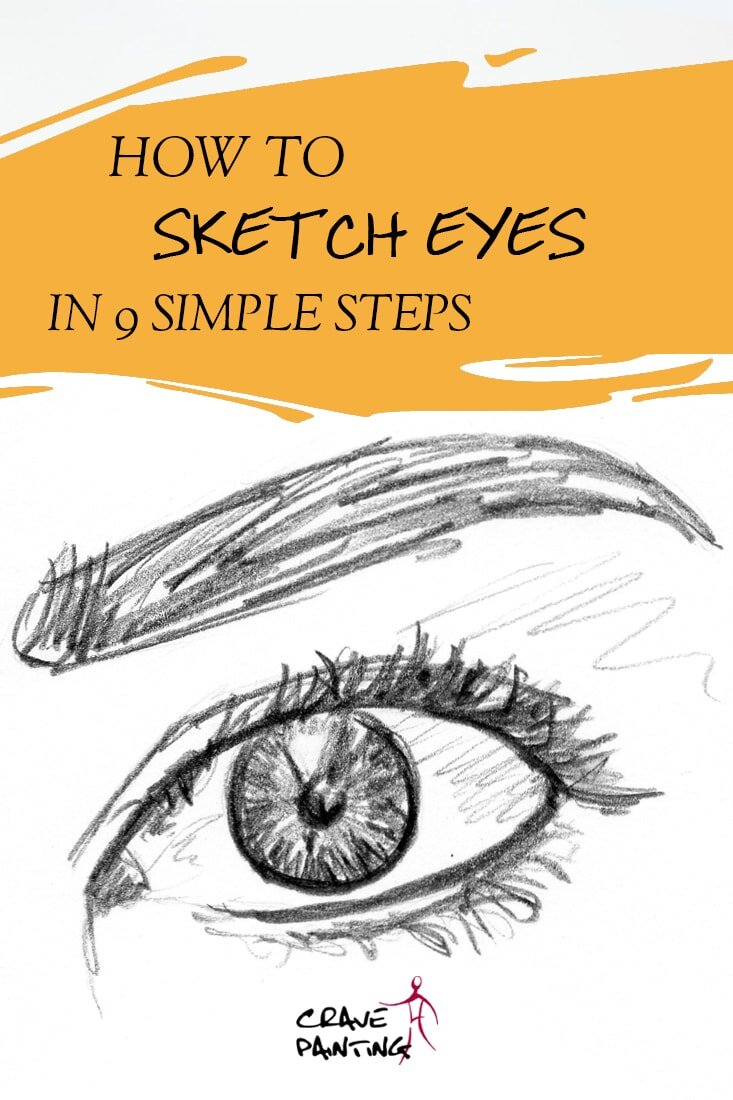
How to Sketch Eyes correctly in 9 simple Steps
Eyes are one of the most important parts of any portrait drawing. They tend to be what we look at first, because we are biologically programmed to, even if they're not meant to be the focal point.
Because of that it's crucial to get them right. Luckily with a few tips and tricks and just a little anatomical knowledge everyone can become a master at sketching eyes. These easy steps will help you succeed.
A little note here: this post is about the drawing of human eyes; however, a lot of the principles are also applicable to animal eyes.
Some quick anatomy
I know, I know, who wants to read about boring human physiology when making art is so much more interesting. But I promise you, with just a tiny bit of anatomical knowledge you'll have a much easier time understanding and thus drawing the human eye.
Human skull. Note the bone structure around the eye sockets.
First of all, the eyeballs sit within the sockets (orbits) of the skull. They don't however fill them out completely, which is why the area immediately around the eyes seems to recede a bit.
The eyeball is held in place by muscles, which allow for quite a bit of free movement, so that we can look up, down, right and left without having to move our entire head.
The eyebrows sit a bit higher up, on the protruding part of the frontal bone.
Eyelids are layers of skin that can close around the eyeball. In some eyes, they are "tucked away" between eyeball and frontal bone, creating a fold (more on that later). They hold the lashes, which exist basically to catch particles that might otherwise fly into our eyes.
The eyeball itself is obviously more or less round. We only see the front part of it, which is always covered in a thin layer of liquid, so it will appear slightly shiny.
The thick, rounded cornea protects the iris. If you look at an eye from the side, you'll notice that it actually protrudes a bit more than the white part, the Sclera.
Close-up photograph of an eye. Note the protruding cornea.
The iris is the coloured part of the eye. It has a lot of muscles to regulate the incoming light, which is why it has that pretty radial pattern.
The black pupil right in the middle is actually a hole in the iris, through which the light enters and falls onto the lens. Its size can vary depending on the amount of light, smaller when it's super bright, bigger when it's quite dim.
Generic proportions of the eye area
In this article I am only mentioning the very basics of facial proportions, rather than every single line-up of every detail of the eye with other facial features. Remember that these guidelines are for a generic face and they will differ slightly from subject to subject.
But it's still helpful to have a basic idea of the rough position of the eyes when beginning a drawing. And it’ll come in super handy when you notice something is ‘off’ in your sketch, but you can't quite figure out what exactly it is (we've all been there).
Generic proportions of the eyes relative to other parts of the human face.
In an adult human the eyes are usually either on or slightly above the vertical middle of the head. They sit a little lower on children. We tend to draw them much too high, because we confuse the entire head with just the facial area (i.e. the part above the hairline counts, too).
In many cases both eyes are around one eye-width apart and a bit less than an eye-width away from the sides of the head.
The corners of the mouth tend to line up with either the inner edge of the iris or the pupil. In a side-view it’s the front of the cornea, as seen above.
And finally, the cornea would be slightly angled, if seen from the side. However, this is a point you’ll only need to remember for a very large or very detailed drawing, in a rough sketch it will hardly be noticeable.
Armed with this new knowledge let’s draw some eyes, step by step.
Step 1 Observe
Before you start drawing at all it's always best to take a few seconds to really look at your subject, in this case the eyes. Ask yourself: What makes these particular eyes different from the generic one we learned about above?
Are they quite close together, or maybe far apart? Are they large, small, vertical or angled?
It's a good idea to practice drawing different human eyes, as there is a great variety out there. You'll find enormous differences in shape, size, colour, whathaveyou. My article 5 simple Exercises to teach you how to Draw amazing Portraits has an exercise that'll help you with that.
Step 2 Outlines
Now you can start roughly drawing the outlines of the eyes. Don't worry too much to get it just right, we'll tackle that in step 3.
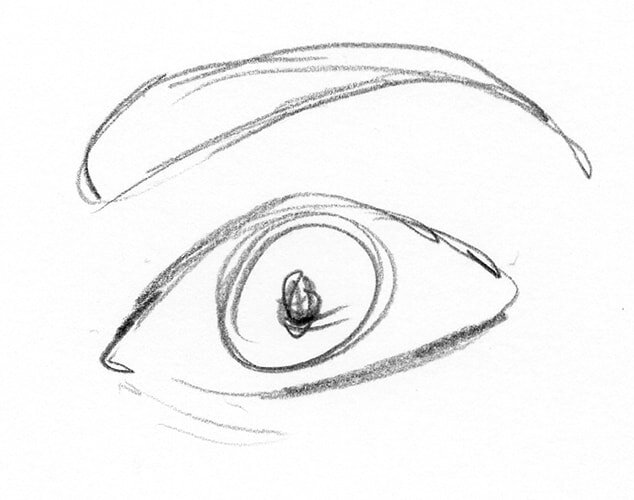
Human eye outlines at the beginning of a sketch. Lines darker for clarity.
Concentrate more on the general placement, size and direction of the eyes. Are they looking up or down, a little to the right or far to the left? Are they wide open or slightly closed?
Naturally you’ll want to use very light lines so you can erase them if needed.
Step 3 Make corrections
When you have your basic outlines, you can begin correcting them, bit by bit until your eyes have just the right size, position, width and angles.
If you've been at it for a while but still feel like something is ‘off’ it's usually best to put the drawing away for a while.
When we look at a sketch too long, we tend to lose the ability to see mistakes. After a day or so you'll have ‘reset’ your brain and will often instantly see what the problem is.
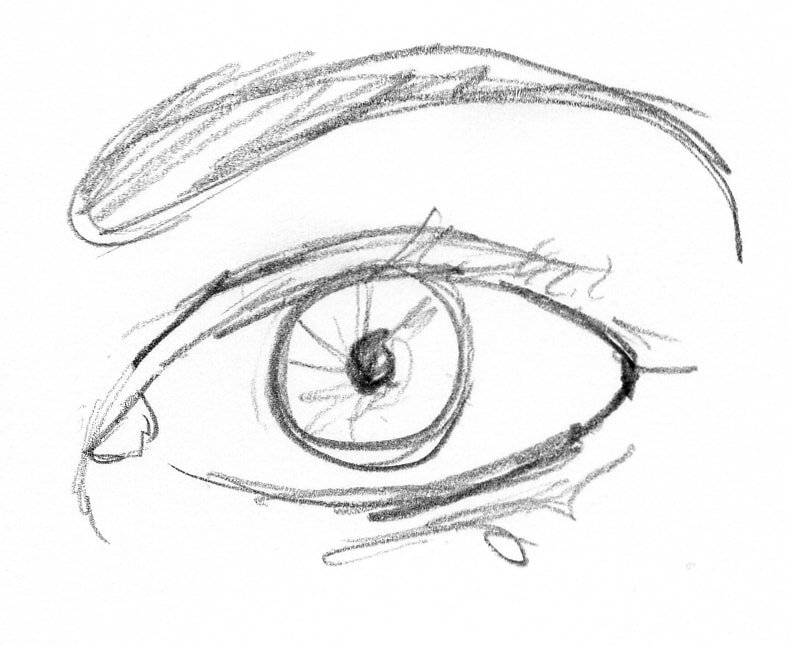
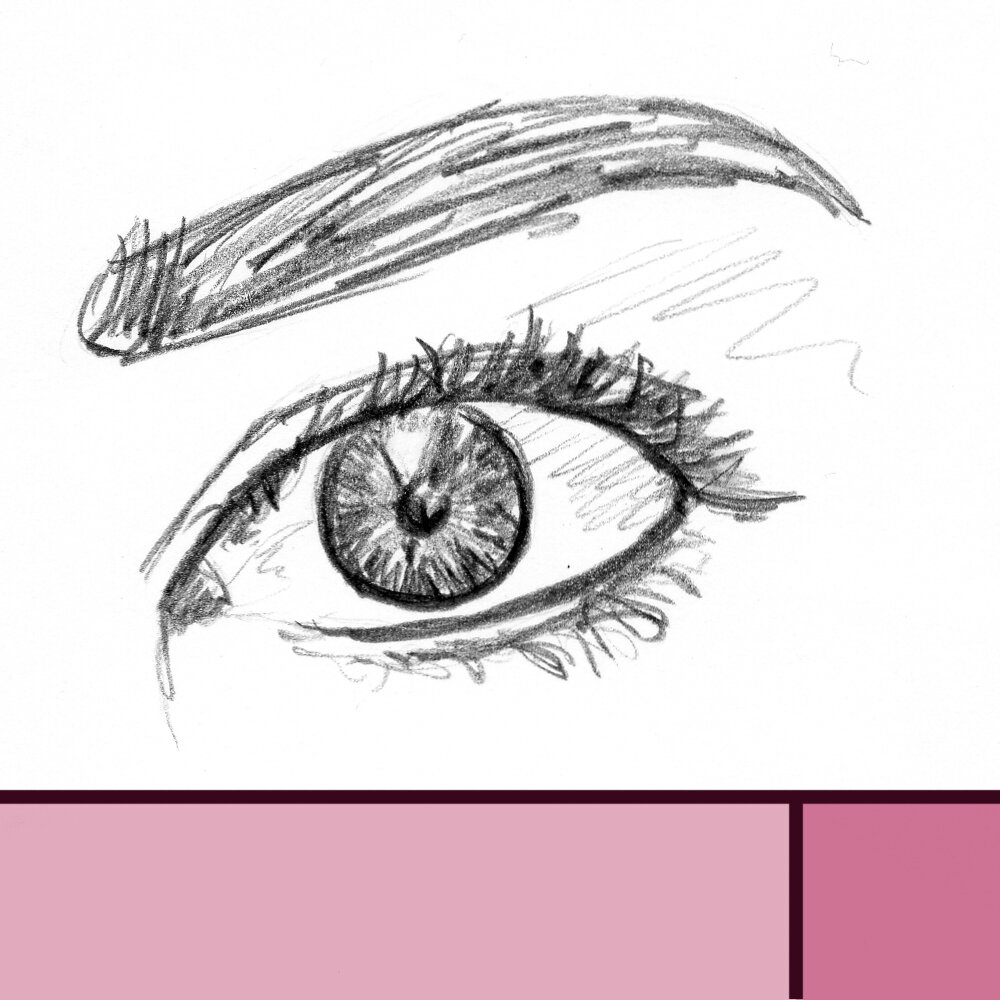
Very rough sketch of a woman’s eye.
When you're working on a very detailed likeness of someone it's important not to rush this step. If anything is wrong with the eyes, now is the best time to change that, before you're starting to add shading and detail.
Especially when you're drawing the eyes first and align other elements of the face to them. Wouldn't want to cause a chain reaction here.
Step 4 Add the third dimension
Right now your drawing is still quite flat. There is no depth to the eye and everything seems to be on one single plane.
But as we've learned above, there is a lot of shape to an eye. The eyeball is round and the areas around it are a bit sunken in the sockets. The cornea protrudes and so do the eyebrows.
Historical eye studies showing clearly the difference between flat outlines and shaded 3-dimensional sketches.
Since our paper however is still flat, we are going to have to make use of some shading, simple or intricate, whatever you're aiming for.
One thing I find always makes a huge difference is adding at least some slight shading to the sclera, the white part of the eyeball around the iris. It instantly gives the entire eyeball a rounder appearance.
Step 5 Drawing the iris
The iris is what gives eyes their colour and can add much interest. You’ll often find that there are a lot of different shades within an iris. For example, blue eyes may have purple, brown and yellow in them, too.
Even if you're staying in grayscale you can add lots of texture here. The pattern is made of rays framing the pupils like the sun, but they need not be perfectly straight or even and they can be interrupted by circular patterns, often of a different shade.
Rough sketch of a woman’s eye with indicated shading.
In a rough or relatively small sketch it's important not to overdo it as too much texture tends to melt together and appear bland in the end.
Step 6 Adding reflections
Bright spots on the iris happen because the thin film of liquid that covers the eyeball reflects the light source. You usually only see it on the iris, because the sclera is white itself, but in general it, too, would have a reflection.
There are different approaches to adding reflections. Some artists prefer to map them out before they draw the texture of the iris, others simply erase parts to create brighter areas at a later stage.
The light sources affect the size, shape, brightness and number of reflections on the iris.
Step 7 Drawing lashes
Lashes seem super easy, it's just a lot of tiny hairs framing the eye, right? Well yes and no. Actually this is where a lot of things go wrong for beginners.
One common mistake is to draw the lashes all straight, spaced in a neat row like lamp posts along a street, just like we did when we were children. When in fact they are a bit of a mess.
Closeup of a woman’s eye to show the growth and position of lashes.
Lashes are usually curved, more or less. And most importantly some of them overlap each other. They don't all grow in the same direction either. Some point a little to the right, some to the left, some down, some straight, some up.
When looking at an eye from the front you’ll also notice that the line of (visible) lashes on the lower lid doesn’t start directly at the margin with the eyeball but a little bit further out.
Step 8 The eyelids
Eyelids are fun, because they can tell us so much about the subject's ethnicity, age, state of mind even.
Some ethnic backgrounds have what's called a double eyelid, which is when the eyelid folds a few millimetres above the eye and builds that crease you can see for example on the photograph of the woman's eye above. Some Asian backgrounds however have a monolid, so there is no visible crease.
Monolids example on South Korean actor Song Joong-ki.
When a person is tired the lids might be lowered slightly, which is also something we do automatically in bright light conditions or storm, to protect our eyes.
And an older person might have the crease (if they had one to begin with) partially or entirely hidden by a layer of loose skin from below the eyebrows.
Either way, lids are quite easy to draw, usually all that is needed is a slight indication of a line where the fold is (if they have one) and perhaps a little bit of shading here and there.
Step 9 Adding eyebrows
And finally, the eyebrows. We might initially think they're not that important, but leave them out in a portrait and see what a difference that makes.
Eyebrows, too, come in all sorts of shapes and sizes, so you'll need to take a good look at your subject to get the curve right.
One important thing to realise is that, just like with lashes, the hairs of the brows don't all grow in the same direction.
Closeup of eyebrows of a woman showing the hairs growing in many different directions.
Indicator lines to show the direction of hairs within the eyebrows.
On the inside the hairs often grow slightly towards the middle of the face or up. The middle of the brows often has an upward angle, whereas the sides curve down.
However, this is only a rough guideline and some people have different directions of their hairs.
Whichever way they grow, even a rough sketch often benefits from at least a slight indication of the hairs and their direction, rather than being just a black block above the eyes.
For more tips and tricks have a look at my other portrait-related articles.


Did you enjoy this article or feel like you have anything else to add? Feel free to leave me a comment below!
If you like this post, please share it, so others may like it too!